One of the highlights of our summer has been our Friday morning art play group with my friend Suzy and her three kids. We take turns coming up with a project and hosting. In addition to the art projects, the kids play and we fix ourselves a gourmet lunch (PB&J or mac and cheese for the kids :-). Not too shabby. Here is a round up of our projects so far.
Week 1: The gyotaku project I posted about earlier.
Week 2: Glow in the dark art. This project was more or less a bust from a finished product perspective, but the kids had a lot of fun doing it. I totally subscribe to the theory that art should be about process more than product anyway, so it was still a cool activity. The *idea* was to draw a picture with neon crayons and then paint over the entire picture with black tempera paint. In theory, the drawing in crayon would have resisted the black paint and the picture would have "popped" out from the black paint. We just had the wrong materials...turns out real neon wax crayons are pretty hard to find. (A google search turned up just one source...ebay, below.)
)cg~~_35.JPG)
That is what we should have used. Instead we used the Crayola Twistables Neon Crayons, which are much less waxy, closer to colored pencils than true crayons. So they didn't work as well in resisting the tempera paint.
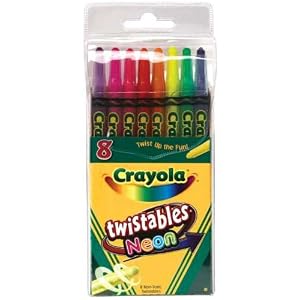
Also the washable black tempera paint was more like a navy blue than true black. Even though I am so thankful for the innovations of "washable" art materials at many key junctures (thank you Elliot for choosing washable markers when you decided to draw all over our sheets and comforter!) they often just don't work as well as the real thing. So, this project is one that I would try again with better materials next time.
Week 3: Giant Self Portraits. An oldie but goodie. We traced the kids in "action poses" on butcher paper and then let them paint their life sized self portraits. This was a big hit from the process perspective. We traced the kids and handed out paint and they really took it from there. I was really impressed that Oliver decided to paint green and blue stripes on his shirt, which was what he was wearing that day. Other notable features he chose to highlight were his Sketcher sneakers that his friend Mark insists are skateboarding shoes (Mark's Sketchers may well be skateboarding shoes, Oliver's I picked up at a consignment sale and I think are just regular sneakers. Oliver thinks they are super cool anyway.) He also drew his leg bones, his underwear, and his penis...so, there you have it, all the important parts accounted for. 

Week 4: Eric Carle-inspired poppies. This was a fun lesson as well as a project. The kids are all familiar with author and illustrator Eric Carle's books (The Very Hungry Caterpillar; Brown Bear, Brown Bear, What Do You See? etc.) Suzy showed them some examples of his work and explained how he creates his signature collage technique. Eric Carle doesn’t just paint his pictures, and he doesn’t just cut out paper to form his pictures, but he does both! He paints beautiful pieces of paper and then uses those as his “palette” to cut out and create collages for his fantastic illustrations. (Learn more about his techniques in his own words.)

The kids then used red and green tempera paint on newspaper to create their color palettes. They experimented with creating various textures by rolling spiral pasta, dragging toothpicks, and racing matchbox cars across the wet paint. We put their sheets of newspaper out to dry for an hour while we had lunch. Afterward, the kids traced and cut out petals and leaves for their poppies. Suzy had already cut out cardboard centers for the flowers. They glued the petals to the cardboard centers and then the whole flower to a stick they had each found outside. Lastly, they used a glue stick on the center of the flower and sprinkled poppy seeds on it. Viola! An Eric Carle-inspired poppy. Oliver was exceedingly proud of his creation.


Week 5: Faux Batik. This may be my favorite project yet. I came across this technique when I googled "batik for kids." This post on the Artist Woman's blog is two years old but some how is enjoying a minor resurgence around the web right now. In the past few weeks I have seen a bunch of other postings referring back to her original post. (Check out Teacher Tom's Tibetan Prayer Flags his class made...awesome!) Anyway, the Artist Woman link above describes the technique in detail so I won't repeat it. Suffice it to say, you'll need Crayola Gel Glue, acrylic paint and some fabric. We chose pillow cases but then when I saw how huge they were I decided Oliver would do better with a slightly smaller canvas. I cut a smaller square out of the pillow case that I will stuff and sew it back up into a little pillow.
This is a two-day project because the glue has to dry over night before you can paint it. So at first I gave Oliver the fabric square and a bottle of glue and told him to create a design. He is really into rocket ships and fighter jets lately so that is what he chose to draw. Drawing with the glue was a little tricky for him, so for the other side I had him draw his design with a disappearing ink pen (we also could have used a pencil) and then I traced over his drawing with the glue. 

The next day we painted over the fabric with watered-down acrylic paint. I was a little worried that it wasn't going to work because it looked like the paint had been absorbed into the fabric even where the glue was (where it was supposed to resist). But it came out beautifully. I guess the paint gets absorbed by the gel glue which prevents it from soaking into the fabric. The Artist Woman suggests soaking the fabric in a tub of warm water to get the gel glue off but the colors didn't run at all (since it is paint and not dye) so next time I will just throw it in the washing machine.


I adore Oliver's batik. I think the stars came out particularly well (he had a lot of fun with those!) and I'd like to point out his depiction of the moon and the planet Saturn (in orange). What a treasure!

Next week we are out of town, but the following week we are going to try making marbleized paper with liquid watercolors and shaving cream. I'll let you know how it goes!


7 comments:
You are the world's most fun mom!! We are going to try a few of these Art ideas.
sounds super fun. Heard your big news. Are you excited?
Anna, you're totally inspiring me. Ava paid big bucks for an art camp this summer that did nothing as cool as you've done. I'm rounding up moms next year and starting an art coop for the summer.
And we read a book last night about a mouse that builds her own house and calls it Chez Mouse. I now finally understand your Chez Halverson titled blog... DUH...
Half-naked toddler art and googling "batik for kids". You are running some show over there, my sister. I am so impressed and really love the spaceship. Happy travels.
How great. You're an inspiration to aspiring moms like me. I bet your kids loved it. Big news eh?
what great ideas, Anna!! I have to tell you that I did the shaving cream one with my kids this summer and it turned out so very very cool!! you could cut up the paper and make some super cool notecards ...plus the kids had lots of fun doing it!
what great ideas, Anna!! I have to tell you that I did the shaving cream one with my kids this summer and it turned out so very very cool!! you could cut up the paper and make some super cool notecards ...plus the kids had lots of fun doing it!
Post a Comment